-
Japanese Knives
-
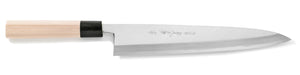
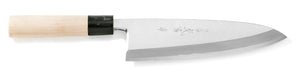
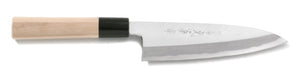
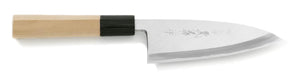
 Deba Knives
 -
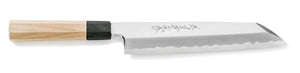
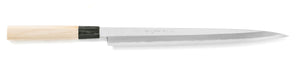
 Yanagiba Sashimi Knives
 -
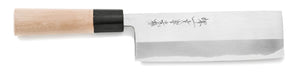
 Usuba Knives
 -
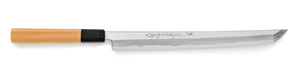
 Sakimaru Takobiki Knives
 -
 Kiritsuke Yanagiba Knives
 -
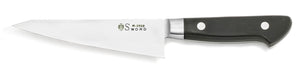
 Wa-Santoku Knives
 -
 Kiritsuke Knives
 -
 Mioroshi Knives
 -
 Aideba Knives
 -
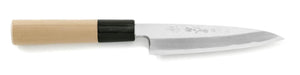
 Funayuki Knives
 -
 Fugubiki Knives
 -
 Takobiki Sashimi Knives
 -
 Aji-Kiri Knives
 -
 Baran-Kiri Knives
 -
 Hamo Honekiri Knives
 -
 Fugu Deba Knives
 -
 Unagi Saki Knives
 -
 Mukimono Knives
 -
 Kenmuki Knives
 -
 Sobakiri Knives
-
- Western Knives
- Damascus Knives
- Home Kitchen Knives
- Accessories
- Gifts
- All Products


Sharpening Santoku and Household Knives
Household knives generally fall under one method of knife sharpening. As many of them have similar structure to gyuto knives, we recommend sharpening household knives the same way that you might do do gyuto knives - and our gyuto sharpening guide can teach you just that! However...
That sharpening style, while it is still a "beginner's guide" is a little more advanced and geared more towards professionals. We wanted an even easier way to teach sharpening to those curious and taking their first steps into the world of sharpening (which is a bottomless pit of amazing things to discover) - so our santoku and household knife guide here is even simpler!
Read along and let's help you sharpen your very first knife! We recommend practicing with this method for a while until you feel comfortable with it. Gradually improve your skills then tackle the style of sharpening in our gyuto guide. We're also always here to help you with guidance along the way or to answer any questions you have - just contact us!
We recommend reading this guide fully before starting, instead of going through it step-by-step. This is so you know what you're going to be doing ahead of time and can plan appropriately. This sharpening also goes on the assumption you are right-handed, so swap hands if you are left-handed.
We do also have a video guide you can watch, which demonstrates proper positioning, methods and answers a few other questions. Watch it below, or on YouTube directly here!
Video: A Beginner's Guide to Sharpening Double-Edged Knives from a PRO KNIFE SHARPENER!
English subtitles are available!!
The Basics of Sharpening Kitchen Knives
Many people out there have never sharpened before - and that's okay! This is a guide for those of you that never have or are still inexperienced.
With that in mind though, it's essential before we talk about the basics behind sharpening itself.
Needed materials
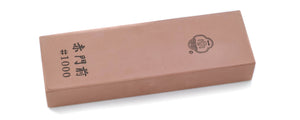
For this sharpening, please get yourself a medium grit water-based sharpening stone.
Sharpening stones, also called whetstones are generally categorised into three broad categories: rough whetstones, medium whetstones, and fine or finishing whetstones.
Ideally, most sharpeners will have at least one of each type, as they all serve different purposes. However, for the sake of this guide a single medium whetstone will suffice.
If you're unsure what to get, we recommend our Kirameki #1000 Medium type for carbon steel knives, and our Kirameki #1000 Medium-Soft type for stainless steel knives. We do also have our Akamonzen #1000 for those wanting to get something more inexpensive they can experiment and learn with. You can also read our guide on choosing a whetstone to help you select!
Sharpening posture
Getting the angle correct when you place your knife onto the whetstone is crucial for a good sharpening experience. When sharpening the right side of the knife, grip the handle with your right hand like the image above using your little to middle fingers. Place your index finger on the spine of the blade, and your thumb near the bottom of the blade next to the bolster. With both your index finger and thumb, no force is needed as this is mostly for stability.
When it comes time to start sharpening, while making sure you keep the knife at a 45-degree angle to the whetstone itself, place your left index finger and middle finger on the blade with slight pressure to get the edge of the blade to make contact with the whetstone and push the knife in a straight line. The point that your left fingers press on the blade will be sharpened, as that is where pressure has been applied. When pulling the blade back towards you, don't use any pressure with your left fingers, but keep your fingers in the same place. Otherwise, the whetstone may grip the blade too strongly and move the entire setup towards you - which could injure you.
Sharpening angle
There isn't a required angle for sharpening double-edged knives. But there are some great starting recommendations which you can springboard from.
We suggest using a 10 to 15 degree starting angle. This is roughly two coins stacked on top of eachother. In our video example, we use two 500 yen coins.
Once you get more accustomed to sharpening, you can experiment with this to make a knife that's more unique to what you want.
Sharpening duration
There's a very straightforward and simple way to check if you have sharpened your knife enough.
As you progress with your sharpening, you might notice some protrusions on the edge of the other side of the blade that you're sharpening - especially if you're checking frequently and feeling for it. These protrusions are called burrs or sometimes as kaeri, as you'll see in the image above.
If there's burrs present in a particular area, it generally means that part has been sharpened correctly. If you don't feel a burr there after checking, then there's a good chance you need to keep on sharpening in that area.
That's the basics of sharpening double-edged knives covered, and you'll apply these basics all the time when sharpening so keep them in mind as you go. From here we'll teach you step by step. Let's begin!
Step 1. Check the knife's condition
Before you start sharpening the knife, it's important to check its current condition.
What's important about sharpening is to remember that it's not just about creating a sharp edge, but also making sure the form and shape of the knife remains the same where possible. If you sharpen without being aware of this, there's a very high chance the knife's shape will change and that can ruin its lifespan as you need to sharpen way more than normal in order to correct this malformation.
Make it a habit to check the blade's condition before sharpening. Look at the diagram below for a quick example, which we've also listed below the picture in case it doesn't appear.
- Check the blade for distortions
- Check the thickness of the left side
- Check the thickness of the right side
Step 2. Sharpen the right side of the knife with a medium whetstone
Sharpening the blade at a 45 degree angle
We'll be using a medium whetstone for the sharpening.
For us to get a knife back to being sharp, we first need to define what "sharp" is. When a knife makes contact with a cutting board or cuts through anything, it's cutting edge will gradually become rounded. When the edge is rounded, the knife can't grip ingredients, so it can't cut. Therefore, we need to return the blade from a rounded state back to a sharp or gripping state that can properly grip ingredients again, meaning it can cut and is sharp once more!
We start this by making a two-step blade, also called a "secondary edge". This is done by holding the knife at a 45 degree angle to the stone like the image below and sharpening just the edge.
Be careful not to sharpen with too much force, as this will cause oversharpening and create a secondary edge that is too large.
A two-step blade is created at the blade's edge
If you sharpen the edge in a upright fashion like suggested above, you'll create the two-step or secondary edge we've been mentioning. An easy way to tell if you've made it is by looking at your cutting edge for a thin white line. Move the knife around and let light reflect off it to make finding it even easier.
This secondary edge is going to be the very tip of your cutting edge and what all your further sharpenings will be based off.
Having this secondary edge makes it significantly easier to see precisely what you're sharpening and the state of the cutting edge during your progress. We recommend creating this secondary edge first so that your final result isn't too thin. The thinner your blade is, the more likely it is to chip.
Step 3. Sharpening the blade at a flat angle
Sharpen until the secondary edge disappears
In this two-step edged state, the blade is going to be quite thick. This reduces cutting power significantly, so it's important to thin that out.
Sharpen the blade using a flatter angle than before, again using a medium whetstone.
The recommended sharpening angle is 10 to 15 degrees
At first, we were sharpening with a 45-degree angle. This time around though, we are looking for 10 to 15 degrees.
An easy way to gauge this is to use two stacked coins on top of eachother. Depending on the coins thickness (try to use the average thickness for your country's coins) you'll get into that 10 to 15 degree marker. In Japan, we tend to use two 500 Yen coins for this.
Sharpening at this angle takes longer compared to before, as there is more steel for the whetstone to grind through.
While this might feel a bit more difficult, persevere and sharpen with patience and you'll get the edge you're looking for!
Keep your wrists steady
Once you've decided on your sharpening angle, move the knife back and forth to keep on sharpening but make sure to not change this angle once you've started.
What we mean by this is as your wrists and elbows are both joints, they tend to shake a little while sharpening. If you're not paying attention, this can cause the angle of your sharpening to change. This can ruin the sharpening process and means the angle might be different on various places of the knife.
In particular, it's your wrist that determines the sharpening angle, so sharpen with your wrist held as steady as you can.
We get that this is difficult to do. Keeping an angle steady while keeping your wrist steady and paying attention to the sharpening itself is a lot to track. It's a skill that will come to you with time.
Don't change the sharpening angle for any reason. Maintain that 10 to 15 degree optimal sharpening angle for the best performing knife possible.
Widen your sharpening range
Now it's time to sharpen evenly from the tip all the way to the base of the blade. You need to lay blade down on a slightly flatter angle now compared to before.
It's important to visually check the area you're sharpening as you go. The sharpened area should be wider than before too.
If you're not seeing much of a difference, it may because you did not lay the knife flat enough and you may have left your optimal sharpening angle. Be sure to stay within it or the sharpening won't go to plan.
Check to see if the secondary edge has disappeared
Once you've completed the above step and sharpened the entire blade evenly, take a closer look at the edge itself and look for a secondary edge - you shouldn't be able to find one!
If it's disappeared, then proceed to check for a burr on the opposite side of the blade. If you've found a burr on the entire opposite side, and the secondary edge is also no longer visible then congratulations - you've sharpened this side correctly!
Step 4. Sharpen the left side (back side) the same way
Household knives are almost always double-edged and for this guide we're assuming yours are too. This also means both sides need to be sharpened, so switch to your other hand, grip the knife and place your fingers the same way, like when you sharpened with your right hand as the dominant hand, but with your opposite hand. Then, go through the following process on the left side of the knife.
Sharpen at the same angle as the right side
When sharpening the left side, emulate the way you sharpened on the right side as much as you can - specifically with the angle. 45 degrees for the edge and whetstone and 10 to 15 degrees for the height of the spine.
Grind until burrs appear
As before, sharpen the left side of the knife evenly all the way from the base to the tip. Again, you're looking for burrs on the opposite side, which is now the right side of the knife. If you see these from the base to the tip, you've sharpened this side properly too - well done! You now have a knife with a blade that can cut!
Step 5. Make a final secondary edge
While you've now got a blade that can reach a gripping state - that is, can grip to food and cut it, it's going to be extremely thin. This makes chips on the blade very likely. It's important to fix that and add some strength to the blade so it will last you a much longer time.
To add strength to the cutting edge, we once again make a secondary edge!
Raise the blade and lightly sharpen it to make a finely honed edge
The method for making the secondary edge here is the same as when you first did it. Hold the blade at a 45 degree angle and sharpen only the edge of the blade.
Where the difference lies is in the force you use. In this instance, you want to effectively just glide the knife over the whetstone instead of applying force to actually do any sharpening. You'll only need to do this two to three times. Be very careful not to oversharpen here.
Check to see if there's a burr on the opposite side, and if there is then repeat this step on that knife's opposite side.
Step 6. Remove the final burrs
Congratulations! You've made a blade that can cut well and will hold its edge for a while. However, there's one step left to do.
Burrs are going to remain on the blade after all the sharpening and polishing you've done, and if you leave these on there your cuts will be rough. At this stage it's time to remove them for your final piece of maintenance.
There's two easy methods this can be done: Removing with newspaper, or with fine-grained cloth such as jeans.
Removing burrs is very simple. Just move the edge of the blade back and forth against newspaper or fine-grained cloth (be careful if you use your pants for this as you may damage them) about five times on each side back and forth.
Now all that's left to do is to test your knife!
Step 7. Test your knife on some newspaper
Grab some newspaper and test your knife against it by cutting. You're looking for a smooth cut here.
If you are able to smoothly cut through the paper - congratulations! You're done with a basic sharpening!
If you find your knife catching on any areas, that part of the knife may not be properly sharp or burrs may still be attached. Repeat the appropriate steps above to make sure your sharpness is equal across the blade. This may take a few times to get right the first time, but once you do you'll have a brilliant knife.
Step 8. What next?
The sharpening method listed here is a basic sharpening guide for beginners. It's important to get these fundamental sharpening steps right first, so continue to improve your skills here. This will come with practice.
Once you have though, then it's time to move onto a more advanced sharpening. This is because this basic sharpening won't get your sharpness back to the knife's original state. While it will get you a performance increase, you can certainly achieve better results with more indepth sharpening techniques. Structurally, this basic sharpening misses some key steps to give the knife more durability and stability. Sharpening only using this method will lead to a thick blade, and uneven sharpening over time.
To reduce this thickness and bring back that amazing edge the knife would have first had, a coarse whetstone is required in order to grind through the steel.
Our guide about sharpening a gyuto knife refers to both the coarse whetstone and finishing whetstone steps. When you have mastered the steps here, move onto that guide and sharpen using the methods it recommends.
We're also available to answer any questions about sharpening you have. Reach out to us via the contact button below and we can advise - or you can send your knife in to us for a professional sharpening. All our knives come with one of these sharpenings absolutely free with no expiry. It's okay to leave it to the experts, but we think there's so much fun in sharpening that you should try it yourself too!